
Materials and Tools
aI often get questions about the materials and tools I use in my work, so I've compiled this extensive list of printmaking tools and supplies. The information below may contain affiliate links. When you click on and purchase these products, we may earn a small commission. This payment comes from the retailer, not from you! I promise to only recommend products I know and use personally. I love getting commission payments, because then I can buy more art supplies :). Thank you for supporting us!
-Katie
Printmaking Supplies, Katie's Notes:
Where I shop:
My number one go-to for buying printmaking supplies is Dick Blick Art Supplies. They have an amazing selection of printmaking materials.
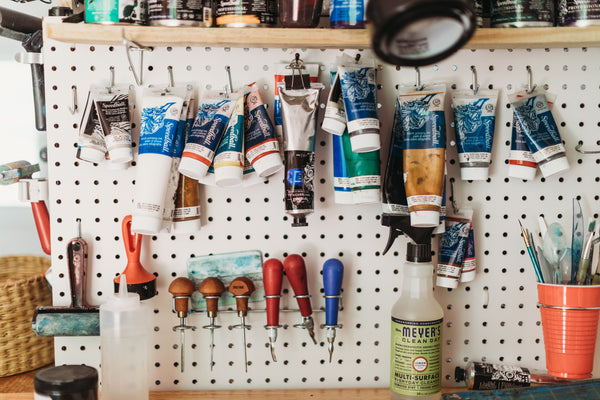
Inks:
Because my work is all focused on the Southeastern US, I decided about 5 years ago that I would I only use Speedball Art Inks in my prints, since they are located in Statesville, NC. There are several types of printmaking inks that I use from them.
- Water soluble. These inks are great for beginners. They dry quickly, come in a variety of awesome colors, and clean off easily with water. I really like their metallic line, especially the copper color. Tip: The main downside to these inks are that they have short open times, meaning you're limited on how many prints you can pull before the inks dry out and you start getting poor results. The plus side to that, is that if you're using them for a background layer, you don't have to wait very long to put on the next layer!
- Oil based. I really like this line of professional block printing inks from speedball. Even though they are oil based, they still clean up with soap and water. (I use dawn dishsoap and get a good lather going for cleanup.) When I first started New South, and I was still experimenting with which papers and inks I wanted to use, I was having trouble with my prints looking grainy. If this sounds like you, I highly recommend that you try Supergraphic Black. It's pure, inky coverage that is LIFE changing. Notes: These inks have long open times, but can take weeks to dry-- especially Super Graphic Black. Make sure they are somewhere they can't get smudged while they dry. If it's a hot (not windy) summer day, I sometimes put them out in the sun to dry as well.

Rollers:
I guess technically these are called "brayers" but I always just think of them as rollers :). I have a variety of these soft rollers from speedball. It's great to have an assortment for the colorwork that I do-- especially when mixing gradients. I use the 6 inch, 4 inch, 3 inch, 2 inch, and 1.5 inch all on a really regular basis. If you're just getting started, start with the 4 inch and then add in different sizes as needed.
For big jobs, I have a massive 18 inch roller from Conrad machine company. I recently also began working with a Lawrence Roller (64mm Diameter, 20cm long, artist version.) Finally, I also have this 8 inch Essdee roller.

Carving Substrates:
Softer blocks:
I love to experiment with surfaces when printmaking, but I do have my favorites that I seem to always come back to. My favorite printmaking blocks are Eco Karve (which is made from 100% recycled materials,) and Soft Kut Blocks (my favorite for puzzle piece printmaking) These softer materials are easy to carve, but it can be VERY tricky to get them to hold fine lines and details. I've found a way to make them work with my style, but it could be a limiting factor for others. I've also enjoyed working with Ready Cut, which is awesome because it has a lighter layer underneath, which allows you to preview how your work will look.
Firmer Blocks:
If you're looking for a harder carving surface, you can use a more traditional lino-- the grey stuff with the jute backing is what I've always used. I like Dick Blick’s Battleship Grey, which comes in large sizes and is very affordable. If you're using this carving substrate, don't try to use the starter, replaceable blade set. Instead, invest in a nice set of tools that can be re-sharpened. I also really like Blick Blue. It's a firm substrate but it has a longer shelf life than the traditional battleship. I order it by the roll.

Carving Tools:
When you're just getting started, I'd recommend that you get a set of these carving tools. They work great on softer carving substrates, and if the blades get dull, you can simply replace them. I hate stopping what I'm doing to sharpen my tools, so these work great for me. :) I also have 3 "handles" so I don't have to stop and switch between blades when I need to use different sizes.
If you get serious about printmaking, you'll probably want to invest in a nice set of carving tools. My first investment was in a few Pfeil tools, and they feel amazing in your hand! I love these and still use them, but I actually think that the Flex Cut tools are easiest to keep sharp. I have the Mini Palm Set, and the Micro Palm Set and use them constantly. If you want to keep your tools sharp, the flex cut slip strop is a must as well.
Papers:
I tried a million different papers before finding one that worked with my style. I primarily use Mohawk superfine paper in my work. This paper is acid-free, archival quality, and FSC certified. It's manufactured in a facility that is powered by wind energy, and it works beautifully for printmaking. If you want to treat yourself, Legion Stonehenge papers are a joy to work with, and come with a beautiful deckled edge.
Barens:
I love the feeling of pulling prints by hand, and still frequently just use a baren instead of my press. My favorite starter baren is this one by speedball. You can also use the back of a spoon. If you're looking to graduate up, or looking for an AMAZING gift for a printmaker in your life, I highly recommend the print frog. This super beautiful glass baren is produced by an artist owned small business in Texas. It's beautiful, portable, and produces amazing results. Honestly, if it weren't for the volume of prints I pull each year, I would never even need a press, because the print frog allows me to get such beautiful, even coverage.
Presses:
I have a woodzilla hand press. I totally love it. I use the 19x12.5 inch size and it works great for most of my prints. You can see often see me putting this press to work in my instagram videos if you want to see how it works.
Last spring I also purchased a Conrad Monotype Press, who I named Shirley. Before Shirley, I was pulling all of my largest pieces by hand. This new press has allowed me to me to work on a much larger scale. So far, I've been absolutely in love with this piece of equipment.

Block Storage:
I have two of these "Stack Racks" stacked on top of each other in one corner of my studio. I know they are pricey, but they honestly help me stay so much more organized. I use them for storing carved blocks, but you can also use them for drying. I usually take a 12x18 piece of cardboard, set the block on top, and slide it in for easy access. I also label each piece of cardboard, so I can see at a glance which block it holds. If you have a ton of blocks like me, a system like this will save you so much time!